If you’ve been following the data persistence landscape recently, the writing isn’t just on the wall it’s in the official documentation. With MongoDB’s decision to deprecate Realm (Atlas Device Sync and the broader ecosystem pivot), the "Realm vs. CoreData/SwiftData" debate has effectively ended. We are looking at a hard wall in a few years where legacy Realm databases will become technical debt at best and a security liability at worst.
The transition to SwiftData isn't just a recommendation anymore; it’s a necessity for any app intended to survive the next three to five years of iOS iterations. But as many of us have realized, migrating a production grade Realm schema to SwiftData isn’t as simple as swapping a few import statements. It’s a complete architectural shift.
This is exactly why I built SwiftDataTranslator.
The Technical Debt Wall
Realm’s architecture is fundamentally different from how SwiftData operates. Realm uses its own database engine and proxy based objects, while SwiftData is a high level wrapper around Core Data, powered by the new Swift Macro system.
When you migrate, you face three major technical hurdles:
-
Schema Disparity: Mapping Realm’s
ObjectandEmbeddedObjectto SwiftData’s@Modelwhile maintaining relationships. -
Type Mapping: Converting
List<T>,RealmOptional<Int>, andLinkingObjectsinto standard Swift arrays and optional types that the@Modelmacro can actually digest. -
Data Integrity: Moving thousands of user records without corrupting the graph or losing primary keys.
Deep Dive: How SwiftDataTranslator Works
The tool is designed to bypass the manual labor of rewriting your data layer. Instead of you guessing the mappings, the app analyzes the .realm file schema directly.
1. Automated Model Generation
The translator identifies your Realm properties and generates the equivalent SwiftData code. For instance, it automatically handles the transition from primaryKey() to @Attribute(.unique).
Legacy Realm Model:
class User: Object {
    @objc dynamic var id = UUID().uuidString
    @objc dynamic var name = ""
    let items = List<Item>()

    override static func primaryKey() -> String? {
        return "id"
    }
}
Generated SwiftData Model:
@Model
final class User {
    @Attribute(.unique) var id: String
    var name: String
    @Relationship(deleteRule: .cascade) var items: [Item] = []

    init(id: String = UUID().uuidString, name: String = "") {
        self.id = id
        self.name = name
    }
}
2. The Translator Layer
One of the most complex parts of migration is the "inbetween" state. SwiftDataTranslator generates a specialized translator service that handles the object to object mapping. It uses a protocol oriented approach to ensure that every Realm.Object has a corresponding SwiftData.Model initializer.
struct UserTranslator {
    static func translate(realmObject: RealmUser) -> SwiftDataUser {
        let user = SwiftDataUser(
            id: realmObject.id,
            name: realmObject.name
        )
        // Handles nested relationship translation
        user.items = realmObject.items.map { ItemTranslator.translate(realmObject: $0) }
        return user
    }
}
The Migration Engine
The core of the tool is the RealmToSwiftDataMigrationService. It doesn't just copy data; it manages the lifecycle of the migration. Since SwiftData operations should be performed on a background ModelContext to avoid freezing the UI, the service leverages Swift Concurrency (async/await).
Note: Migration is a resource heavy task. Always perform these operations on a background actor to keep the main thread responsive for your migration UI.
func migrateAll(realmURL: URL, container: ModelContainer) async throws {
    let realm = try await Realm(fileURL: realmURL)
    let context = ModelContext(container)

    // Fetch Realm objects
    let legacyUsers = realm.objects(RealmUser.self)

    for legacyUser in legacyUsers {
        let newUser = UserTranslator.translate(realmObject: legacyUser)
        context.insert(newUser)
    }

    // Save the context to persist to the SQLite store
    try context.save()
}
The Interface
While the underlying tech of SwiftDataTranslator is a complex web of schema analysis and concurrency, the user experience is built on the philosophy that sophisticated tools shouldn't feel like a chore to use. I’ve designed the macOS interface to be as intuitive as the Apple ecosystem itself—clean, functional, and focused on getting you over that "Realm wall" as quickly as possible.
Here is a breakdown of the core screens that turn a legacy .realm file into production-ready Swift code:
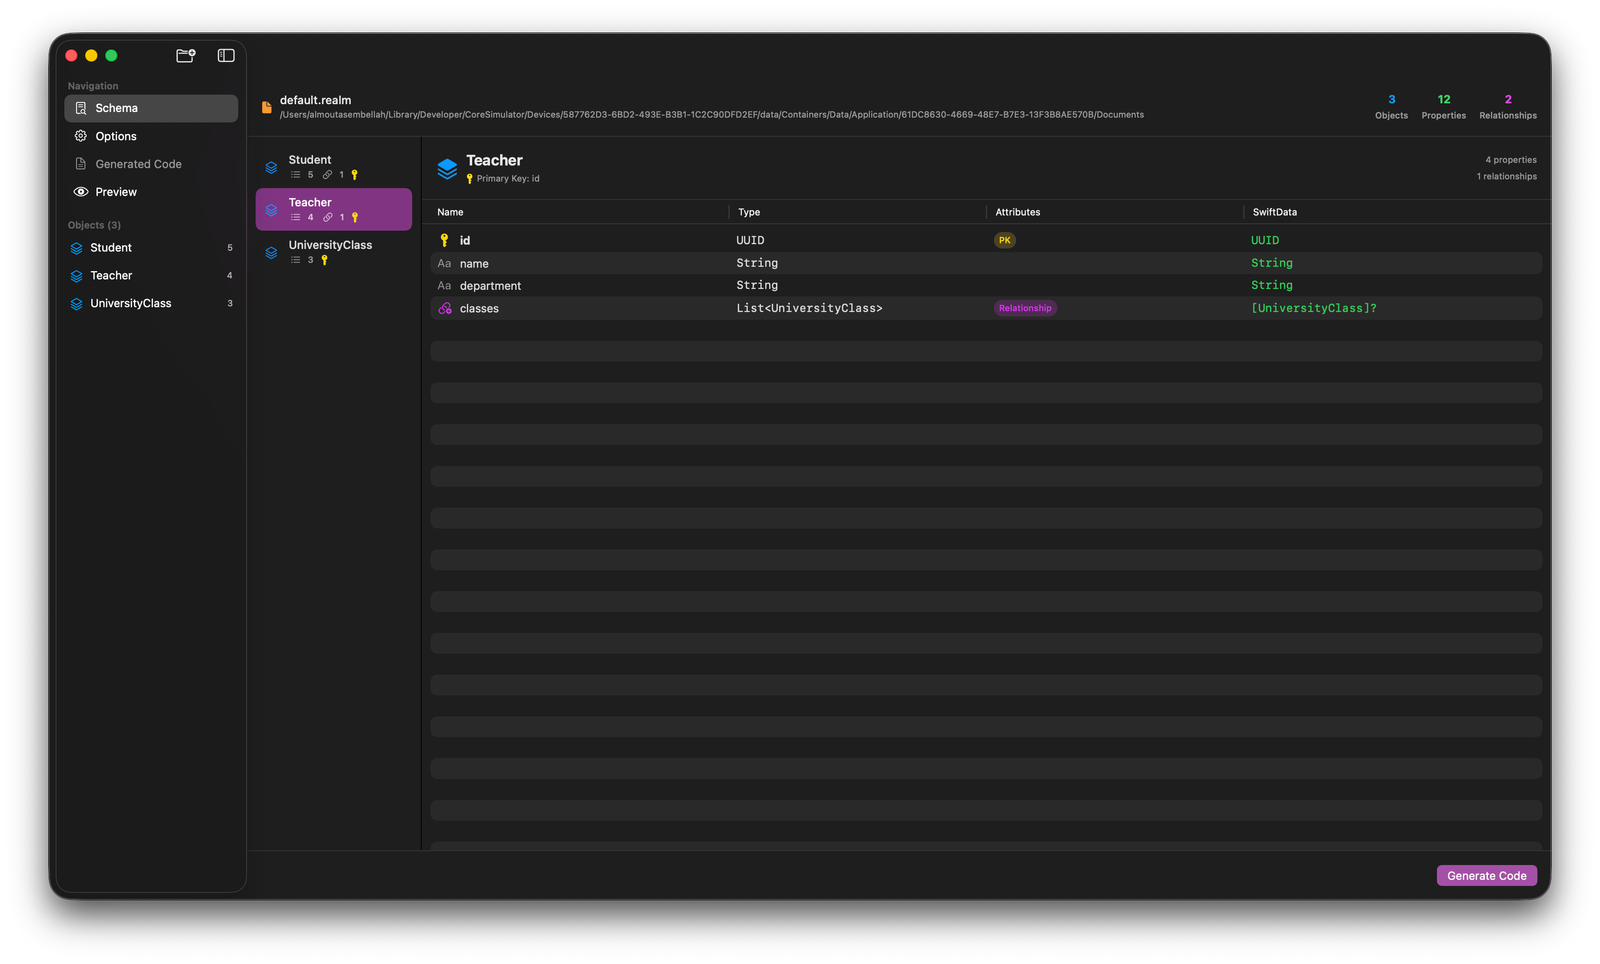
1. Schema Analysis: Seeing Under the Hood
The Schema view is where the magic starts. Once you drop your .realm file, the tool instantly deconstructs your data structure.
-
Object Overview: You get a high-level count of your Objects, Properties, and Relationships right at the top.
-
Deep Mapping: For every object (like
TeacherorStudent), the UI shows exactly how Realm types map to SwiftData. -
Relationship Tracking: It identifies primary keys (like
id: UUID) and complex relationships (likeList<UniversityClass>) and previews how they will look as native SwiftData relationships.
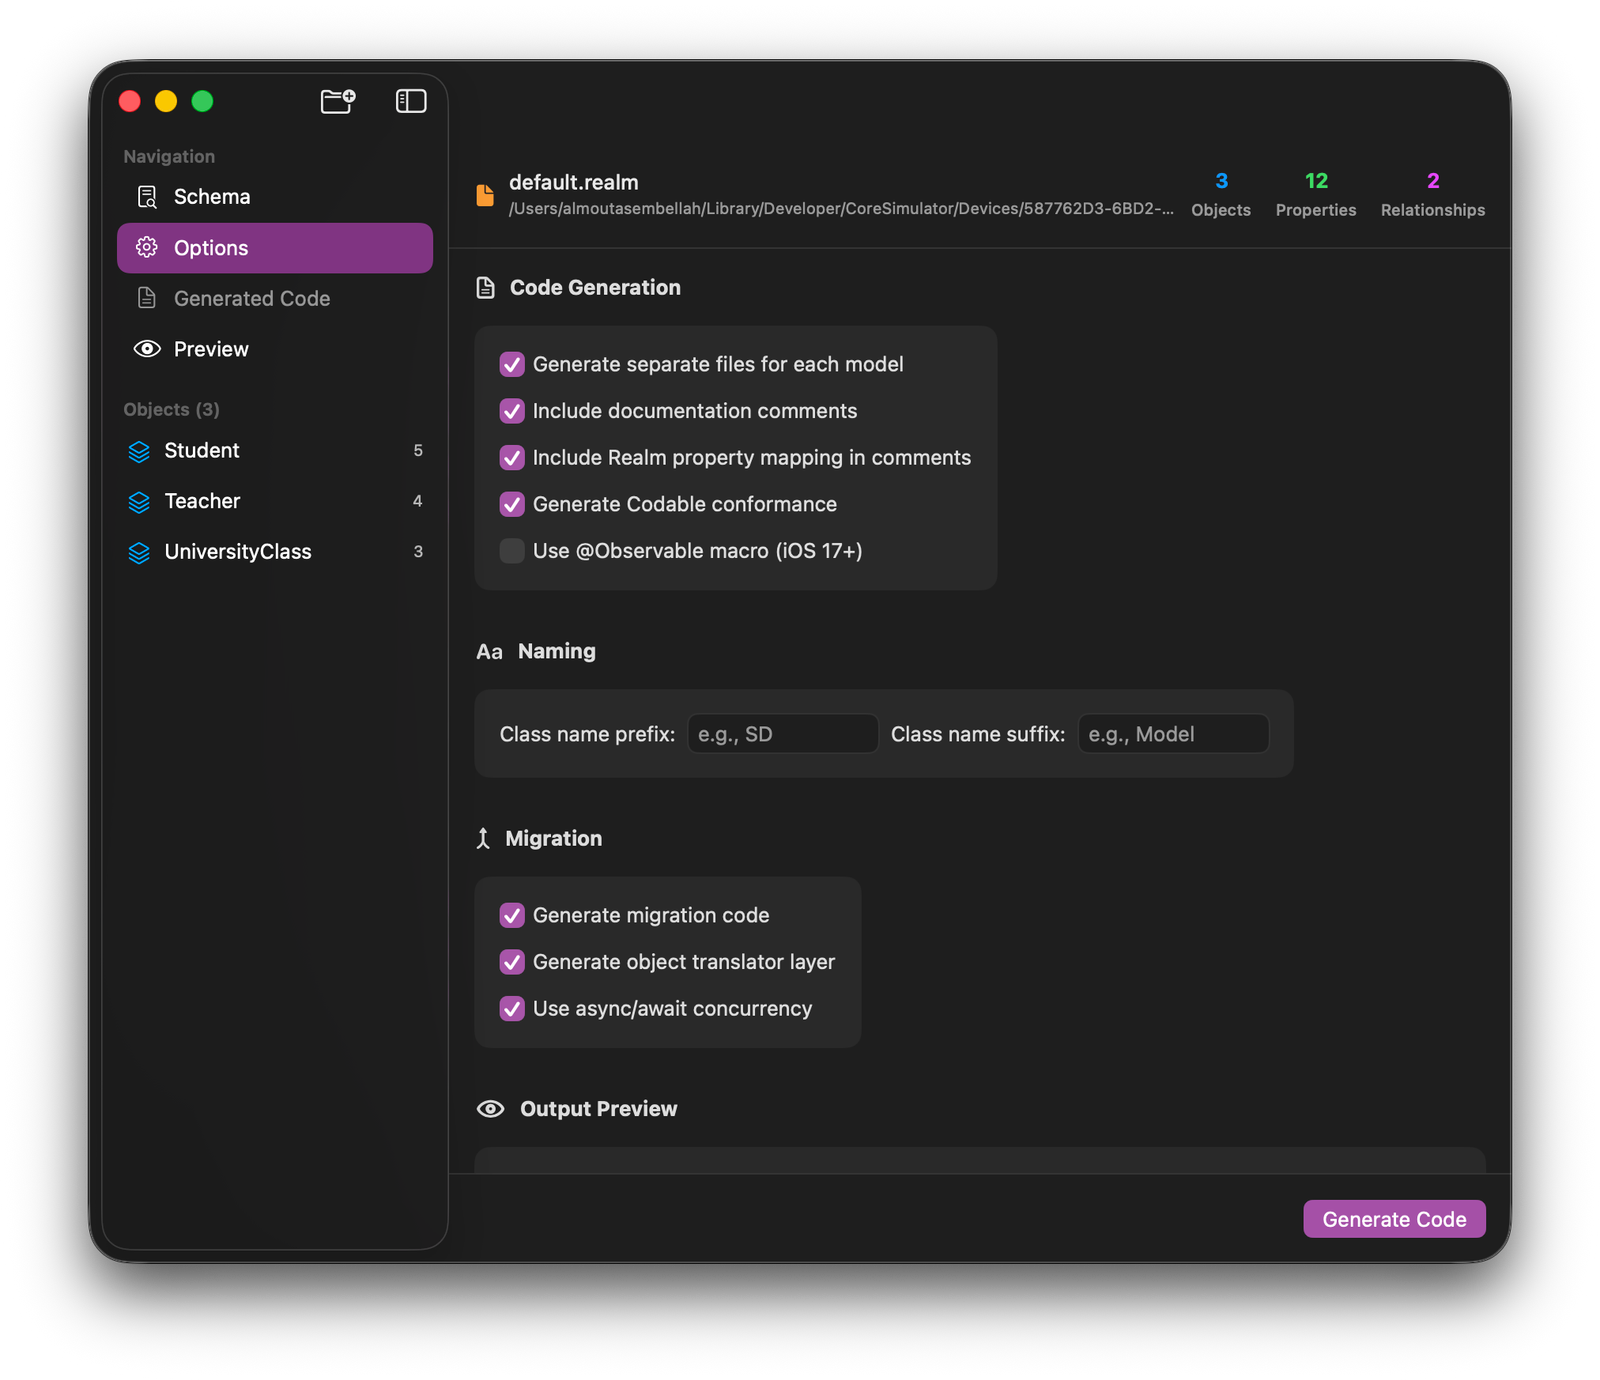
2. Configuration Options: Your Migration, Your Rules
Every project has its own coding standards, so the Options screen gives you granular control over the output.
-
Code Style: You can toggle separate files for each model, include documentation comments for better team handoff, and even automatically generate
Codableconformance. -
Legacy Mapping: A unique feature is the "Include Realm property mapping in comments," which keeps a trail of your original schema inside your new SwiftData files for reference.
-
Concurrency: You can choose to generate your migration layer using modern
async/awaitpatterns to ensure your app stays responsive during the heavy lifting.
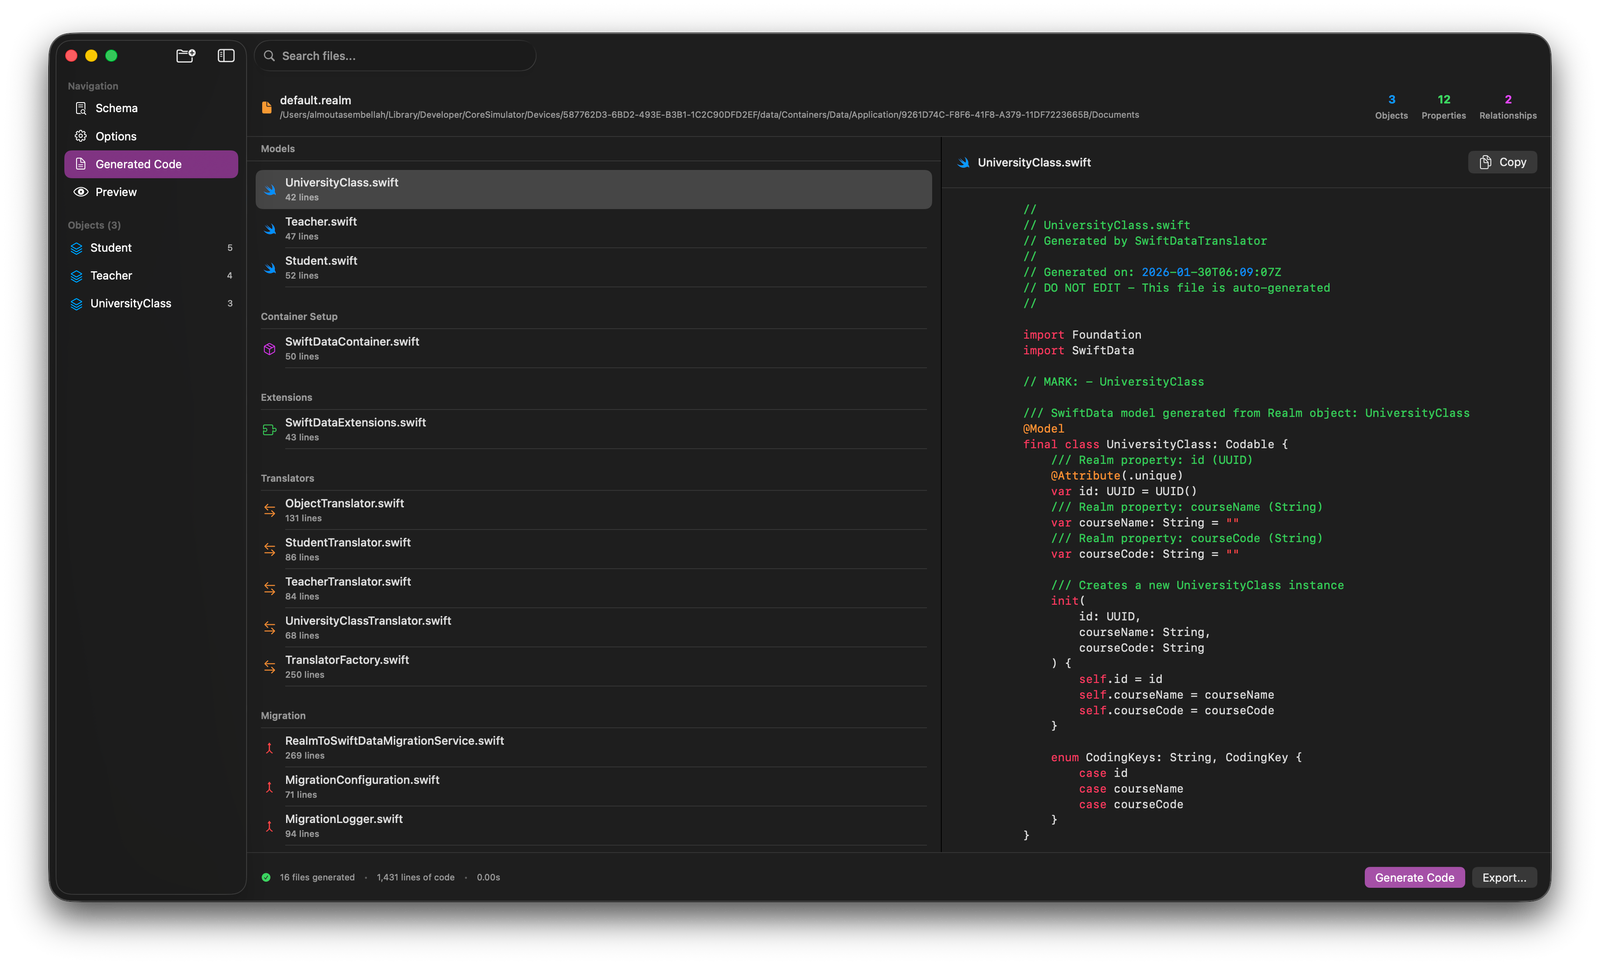
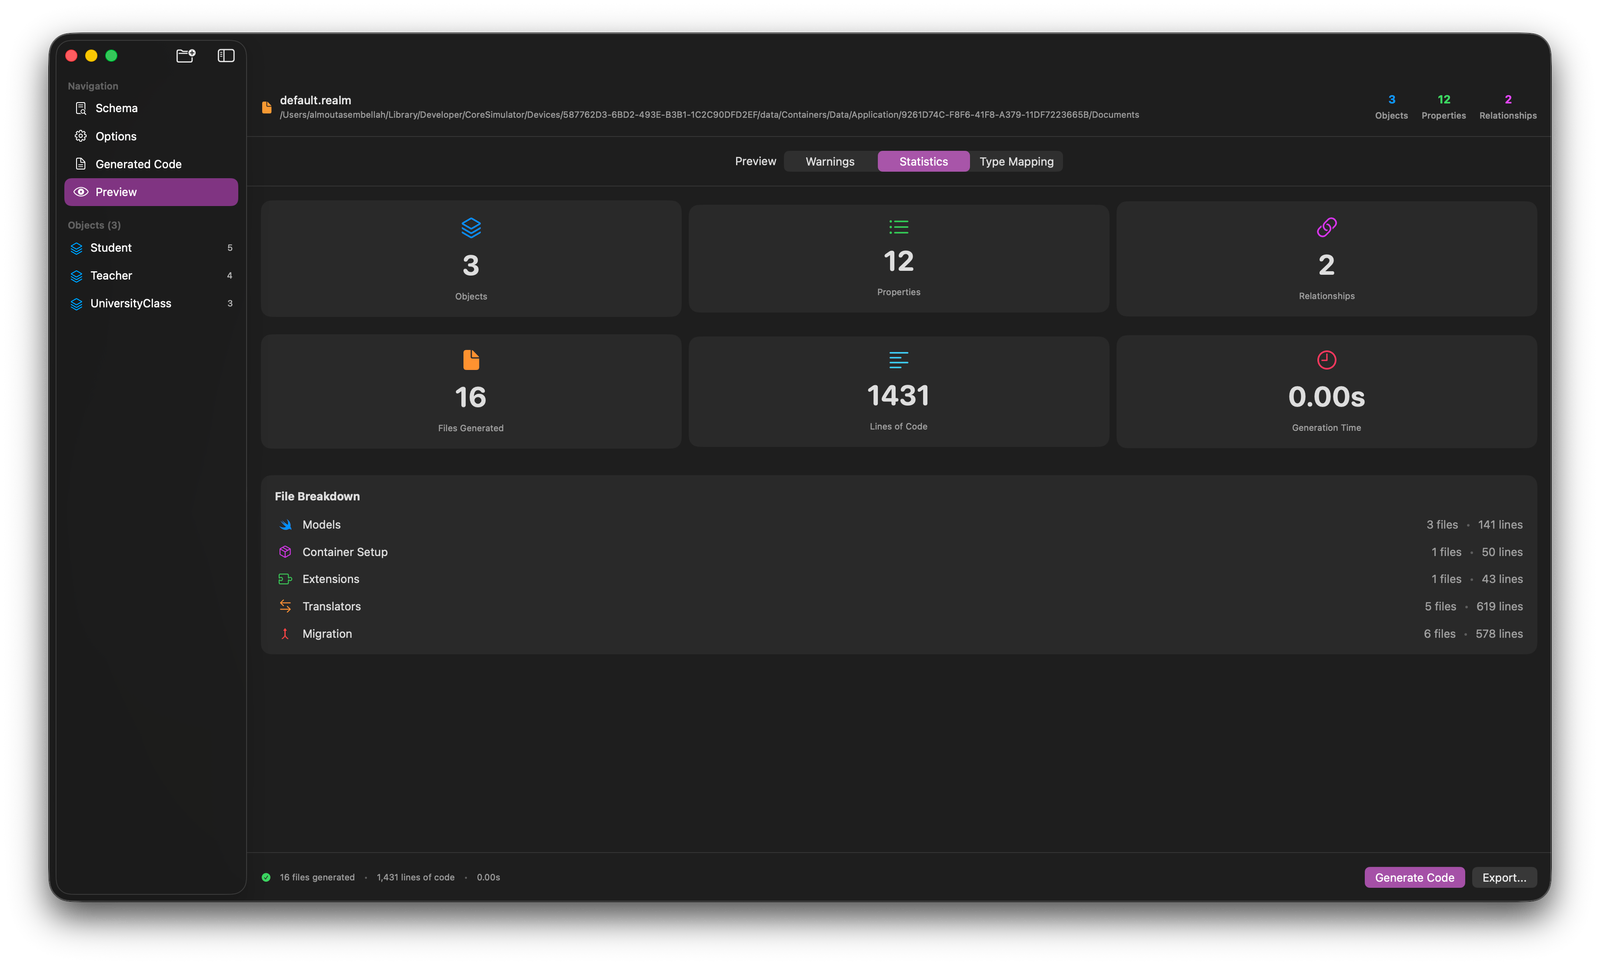
3. Generated Code & Statistics: Instant Gratification
Once you hit Generate Code, the tool doesn't just give you a wall of text; it organizes an entire project architecture for you.
-
Complete Architecture: It generates everything from the
@Modelclasses to theTranslatorFactoryand theMigrationLogger. -
Live Preview: You can browse through the generated
.swiftfiles directly in the app, complete with syntax highlighting and a one-click copy button. -
Efficiency Stats: The Preview/Statistics dashboard gives you the hard numbers—showing you exactly how many files and lines of code were generated in literally zero seconds. In one test case, it generated over 1,400 lines of code across 16 files instantly.
Why a Drag and Drop Tool?
I wanted to make this "as smooth as a native macOS app". You can simply drag your .realm file into the app, and it will output the entire Swift structure. This saves days of boilerplate coding and significantly reduces the risk of manual mapping errors the kind of errors that lead to data loss during migration.
Demo App
Looking Ahead
We are entering an era where the Apple ecosystem is becoming more cohesive than ever. SwiftData is the backbone of that future, integrating with CloudKit and SwiftUI in ways Realm simply can't match anymore. By using tools like SwiftDataTranslator, we aren't just following a trend; we are ensuring our apps aren't left behind when the Realm "wall" eventually hits.
You can find the project and the full source code on GitHub. If you're planning a migration soon, I’d love to hear how the tool works for your specific schema.